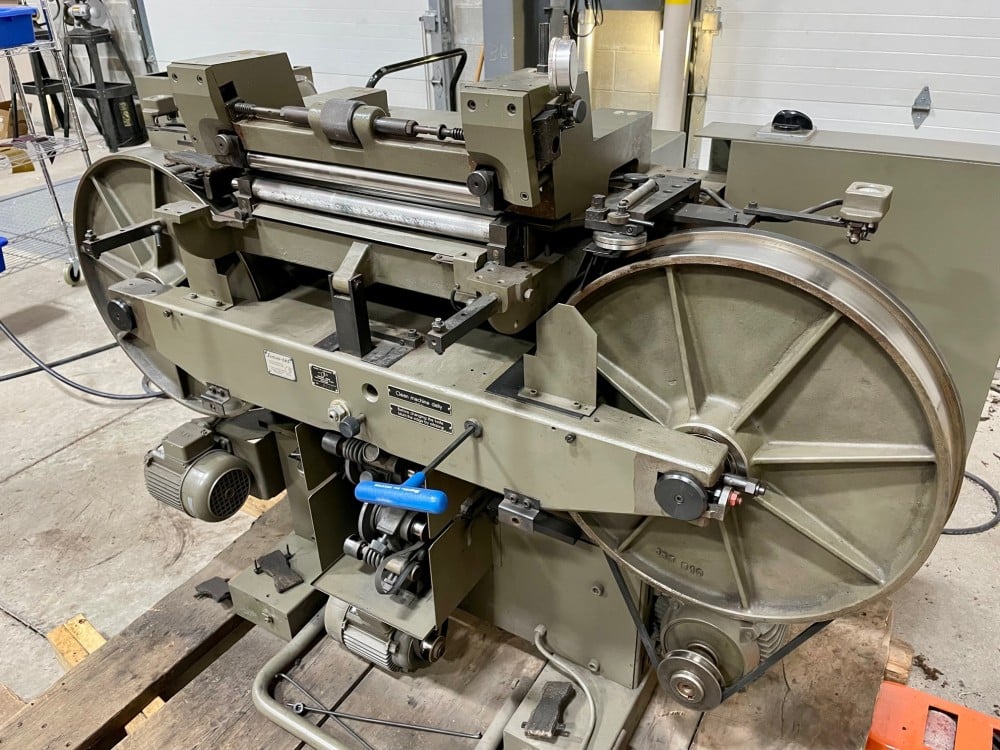
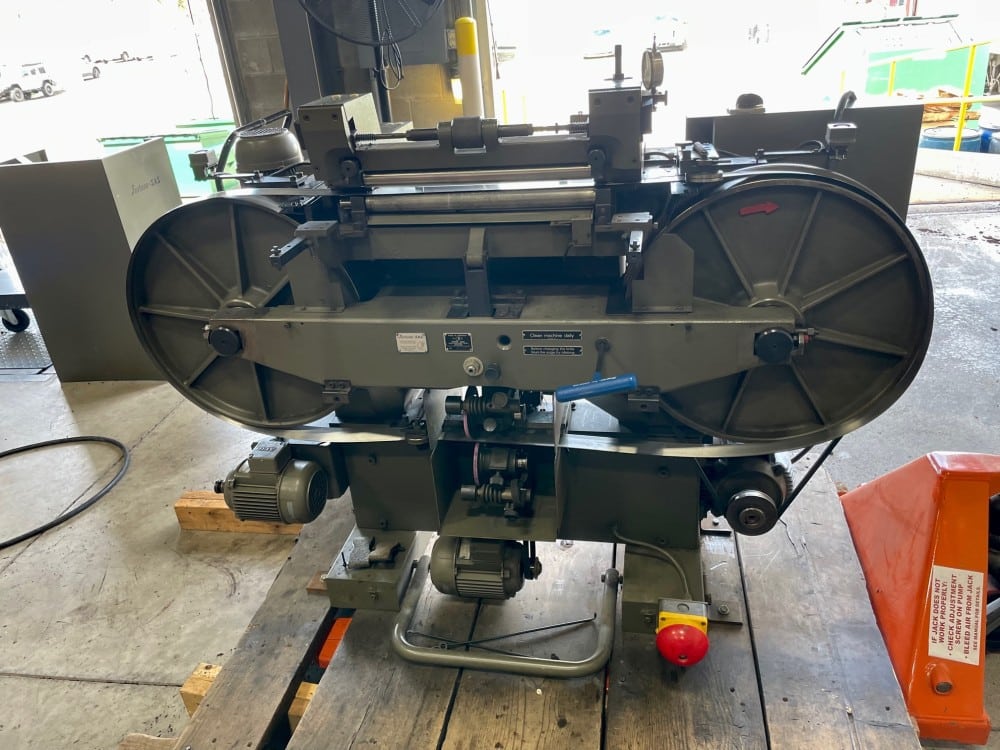
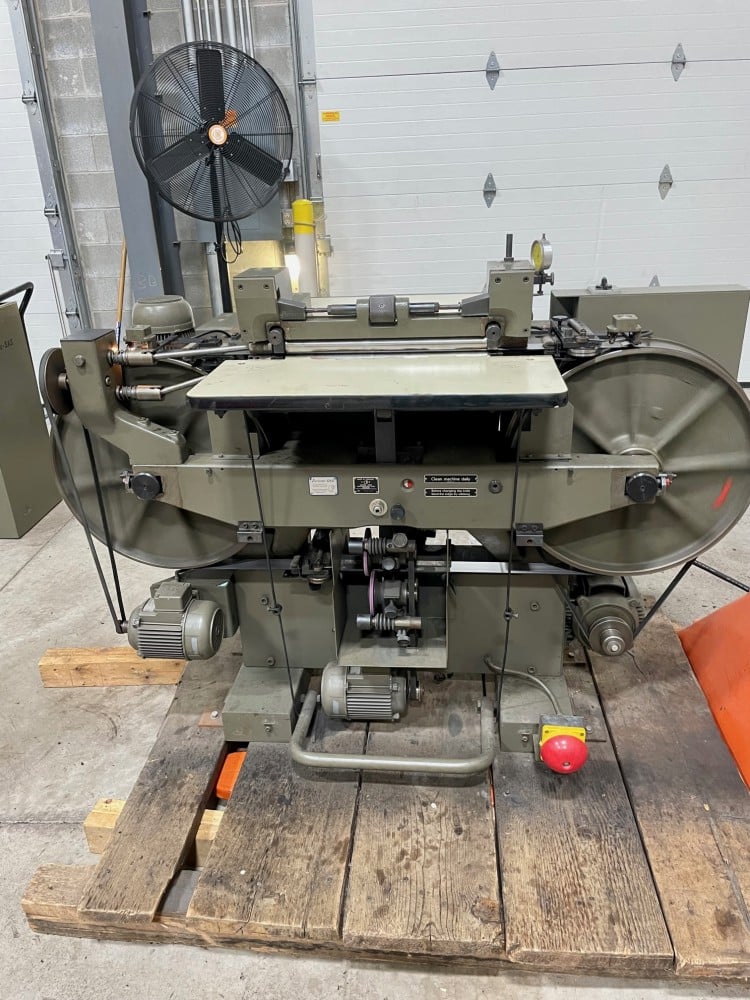
Fortuna SAS Leather Splitting Machine – Band Blade Replacement
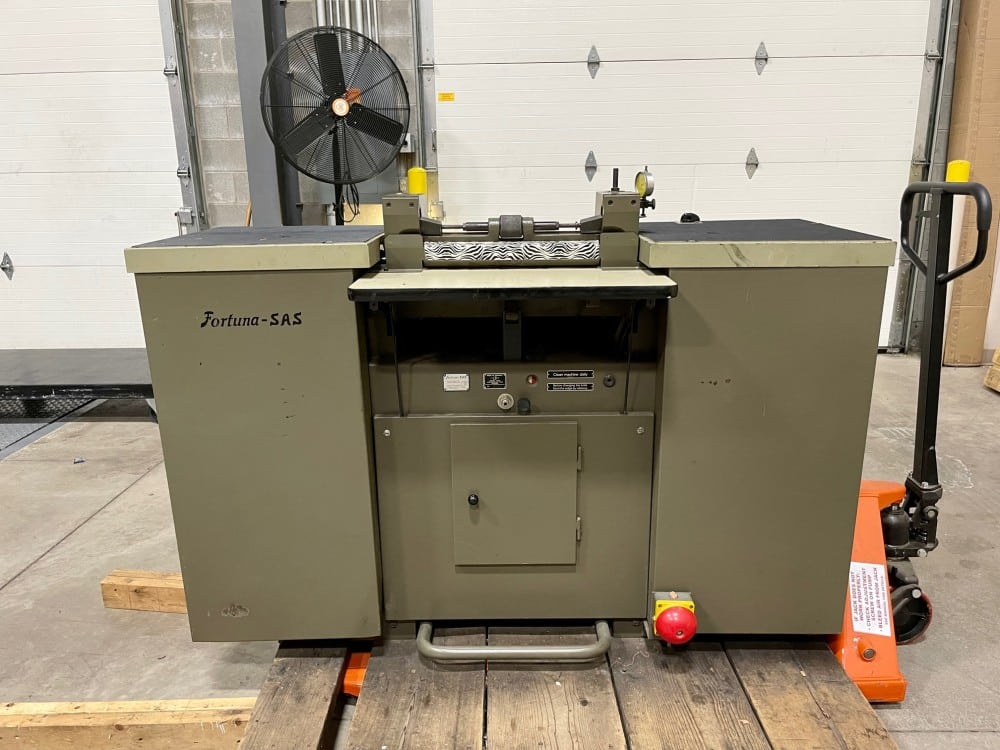
Replacing a band-blade in a Fortuna SAS leather splitting machine can be a complicated job, follow the instructions carefully and have plenty of space around your machine to work. Our Fortuna SAS 15″ band blade leather splitter recently developed a crack in the blade and needed to be replaced. These steps are taken almost verbatim from the Fortuna owners manual.
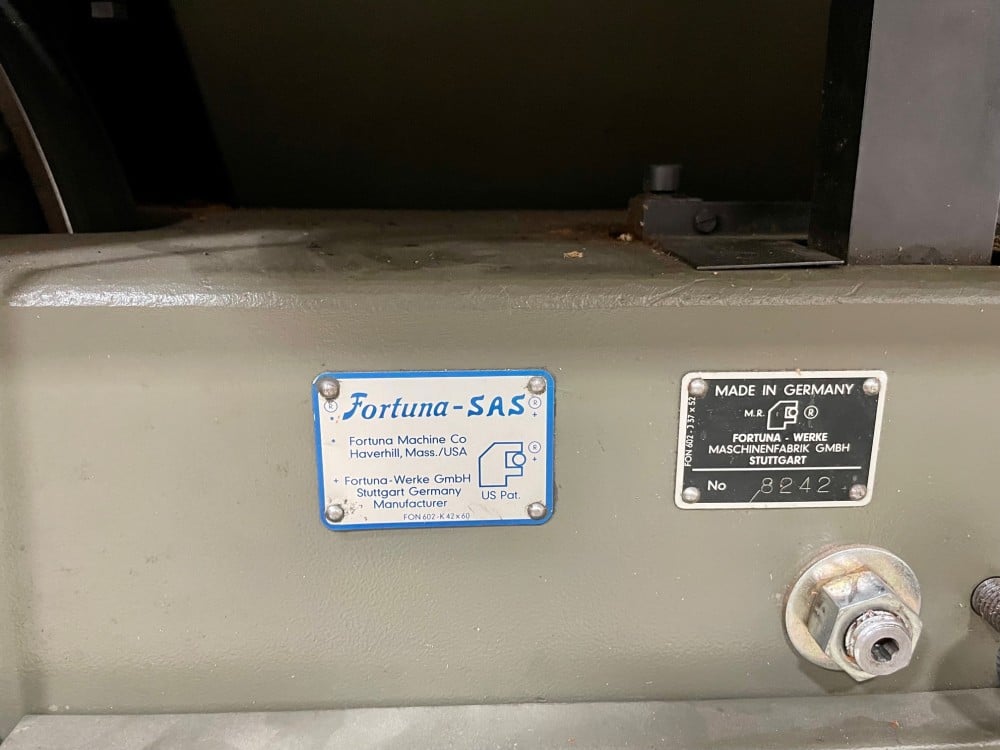
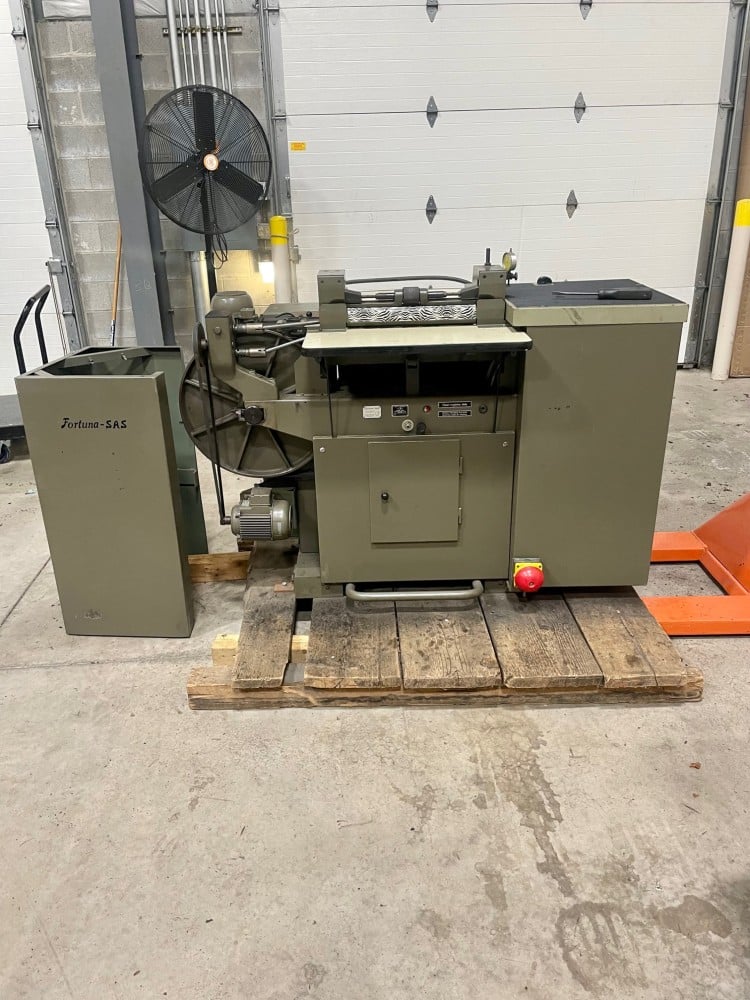
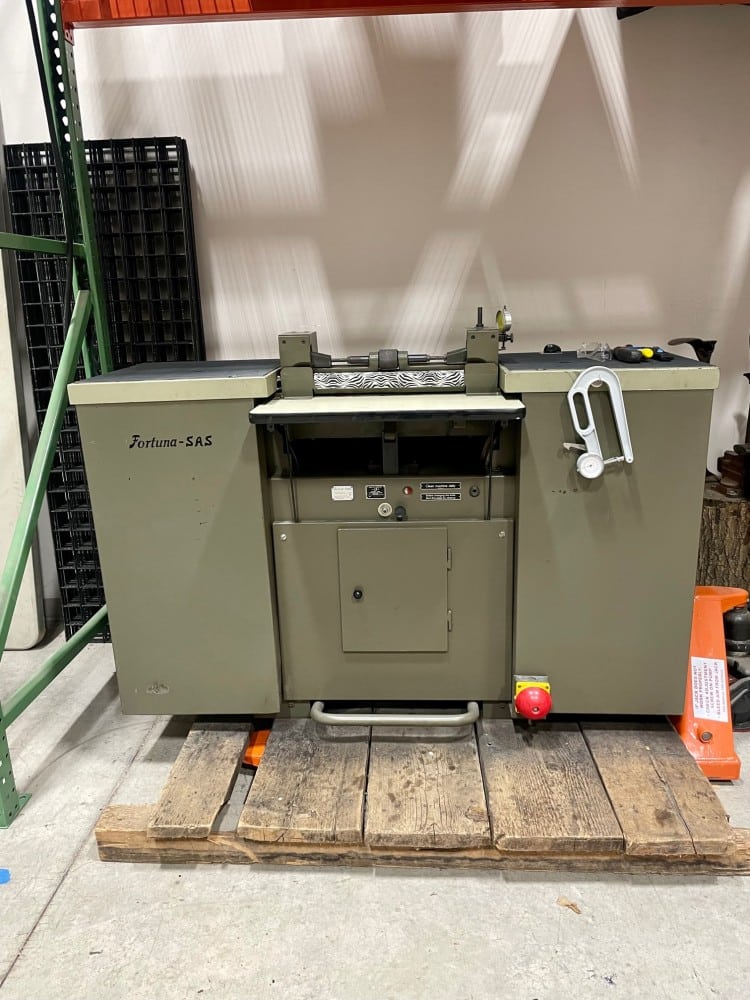
This is our product tag showing the model and serial number of the machine. Fortuna -SAS, this machine used to split leather made in Germany.
Start by removing the left and right side covers as well as the front self sharpening cover.
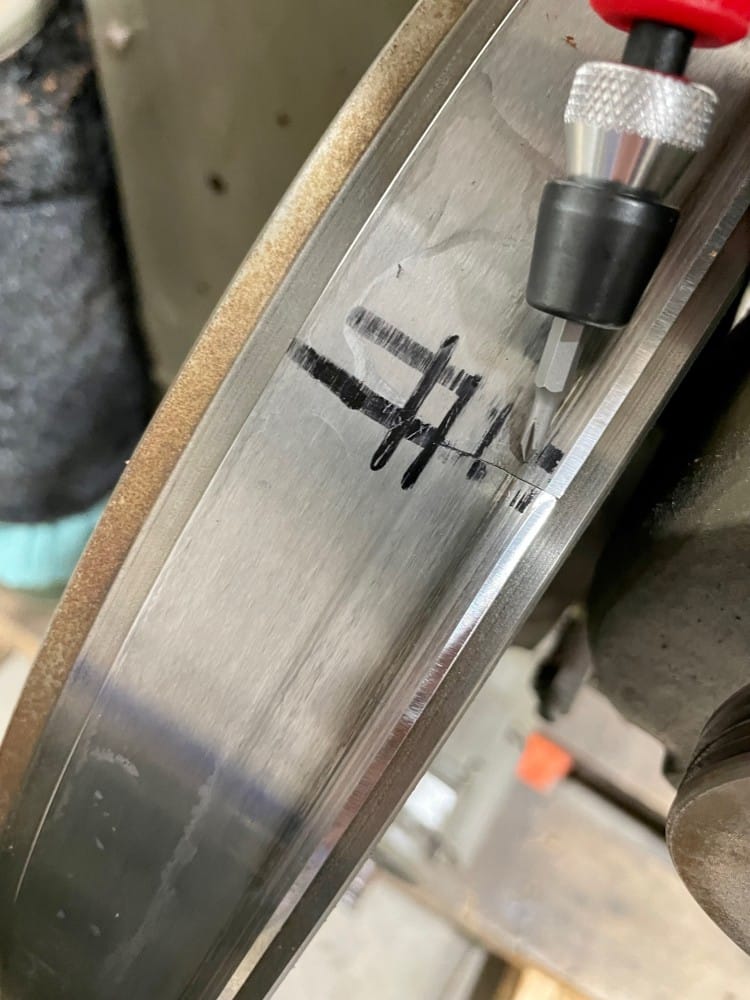
Diagnose the problem, in our case the band blade is cracked as you can see here. The crack started out very small and gradually grew over use. We detected the issue by noticing evenly spaced lines on the flesh side of the leather being split. The blade also made a “Clicking” sound as it ran through the self sharpening stones. Originally we were going to run it until it broke, making it easier to remove, but upon further thought we felt best to just remove it and replace with a new band-knife blade. If you do detect a crack, use a Sharpie to track its progress. As you can see in the photo we used hash marks at it progressed. What caused this crack is unknown, Miles at Campbell Randall Machinery Co. (who knows every detail of this complicated piece of machinery) thinks that we may have had a small scrap of leather wedged under the drive wheel and the blade or some other area of the machine a piece of scrap got stuck under the blade as it traveled around. No matter how it happened the deed is done and the band knife has to be removed.
Before you progress any further, YOU MUST DULL THE BAND KNIFE BLADE! It is very sharp and you will regret not DULLING the blade before you remove it. I used an old wet stone edge directly against the blade edge. Be sure to always wear safety glasses while doing any of this kind of work.
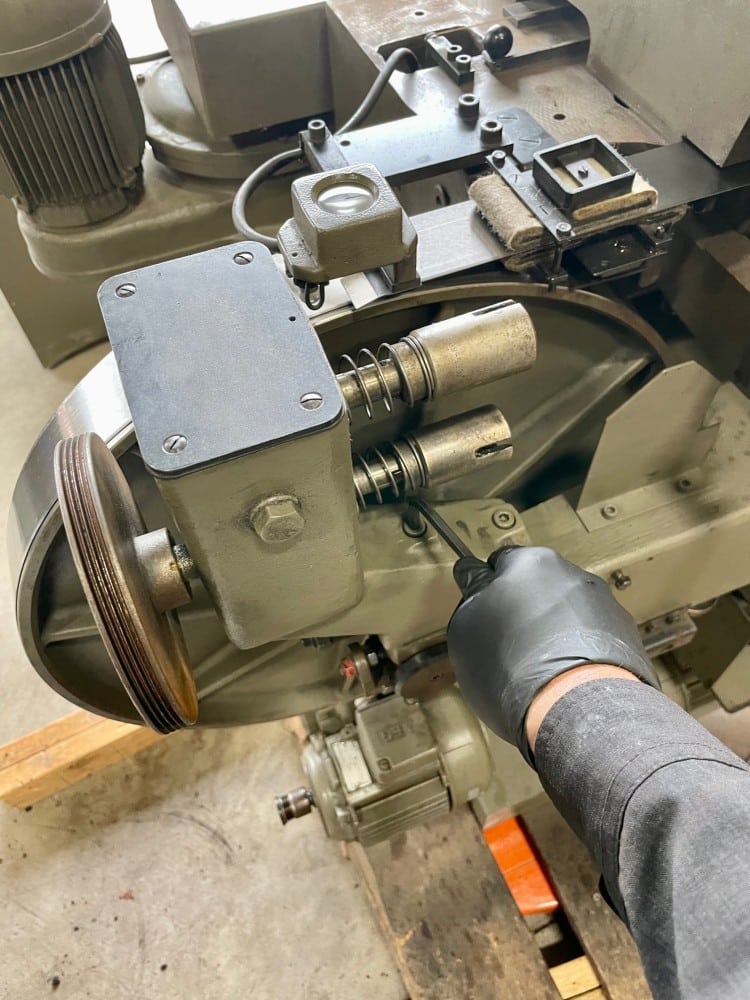
Take off the Poly-V-Belt, remove the upper and lower articulated shaft, then remove feed drive mechanism.
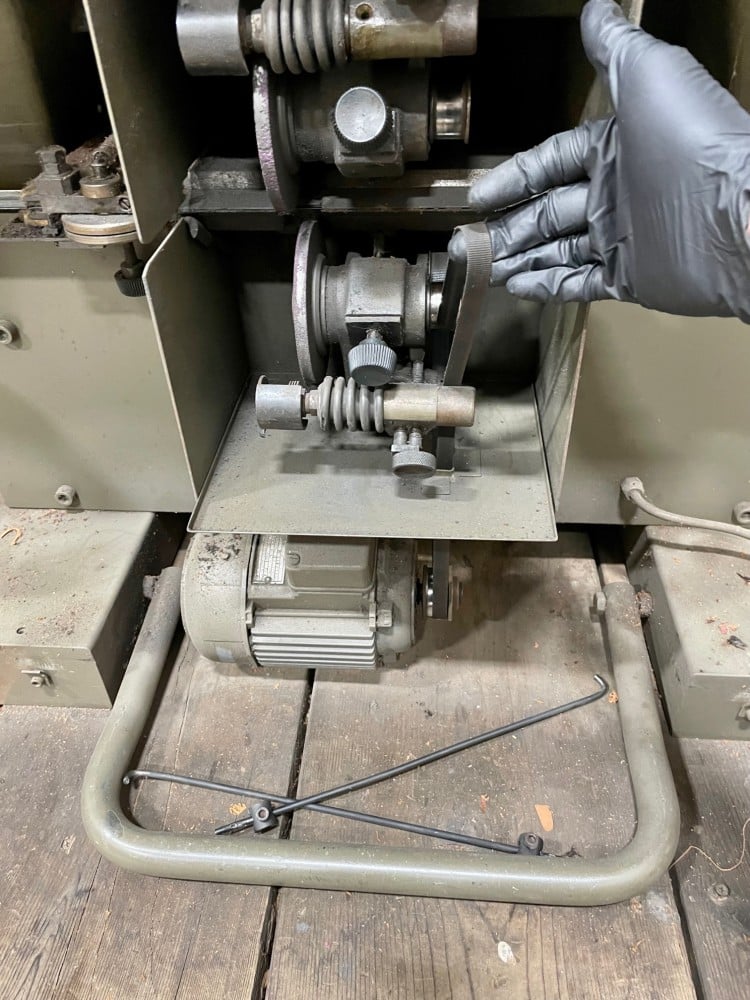
Remove the serpentine belt from the self sharpening system and unhook the traction bars of the pedal.
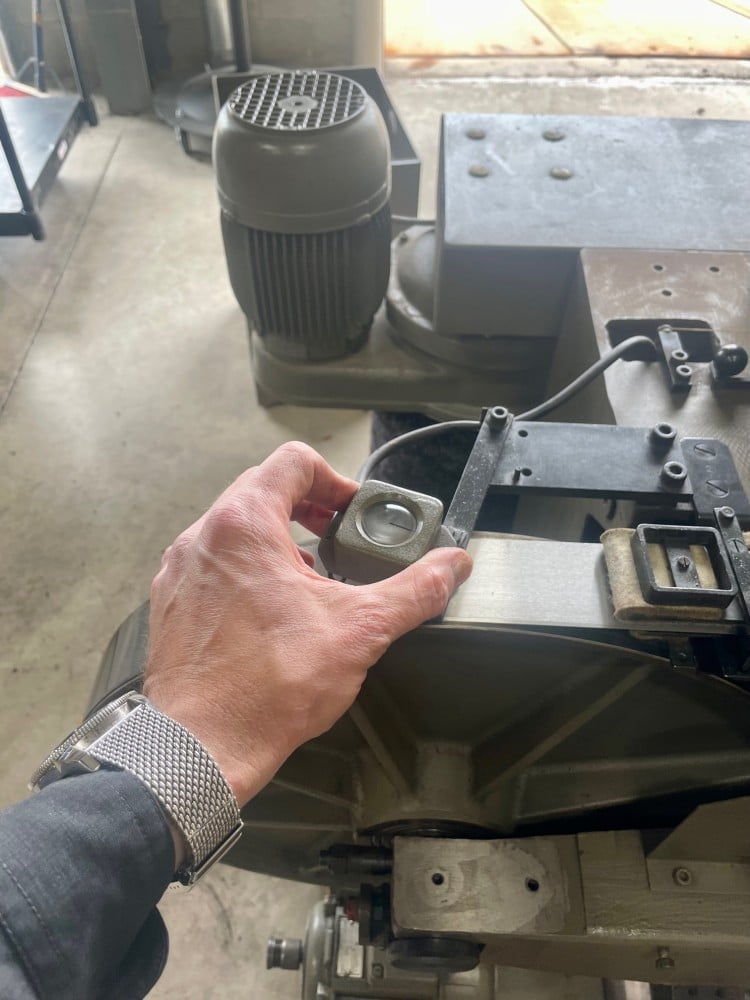
Swing both lens holders laterally out of the way.
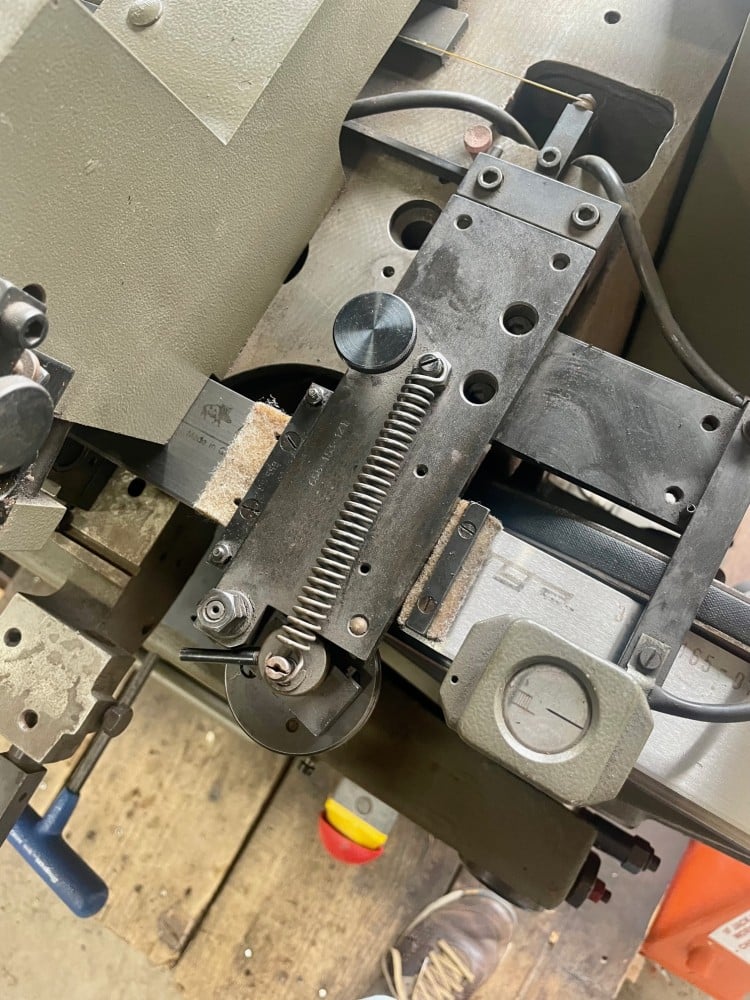
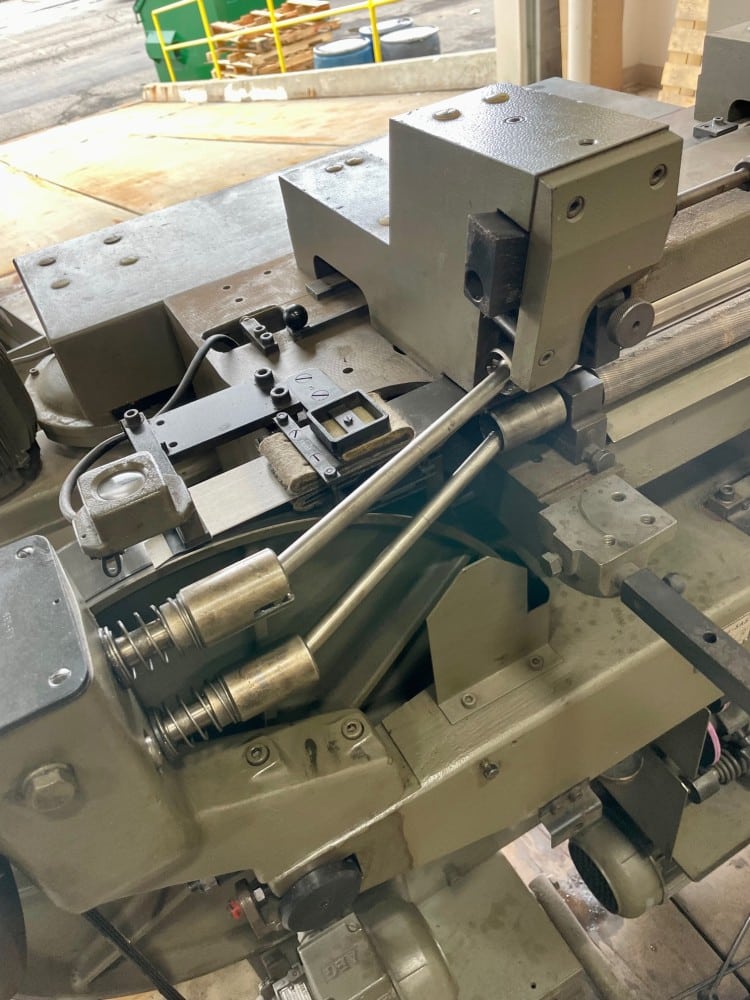
Turn both eccentric disks (Upper and Lower) towards the front, thus separating both supporting rolls from the band knife. Turn the adjusting roller to order to separate the carrier with press roller from the band knife.
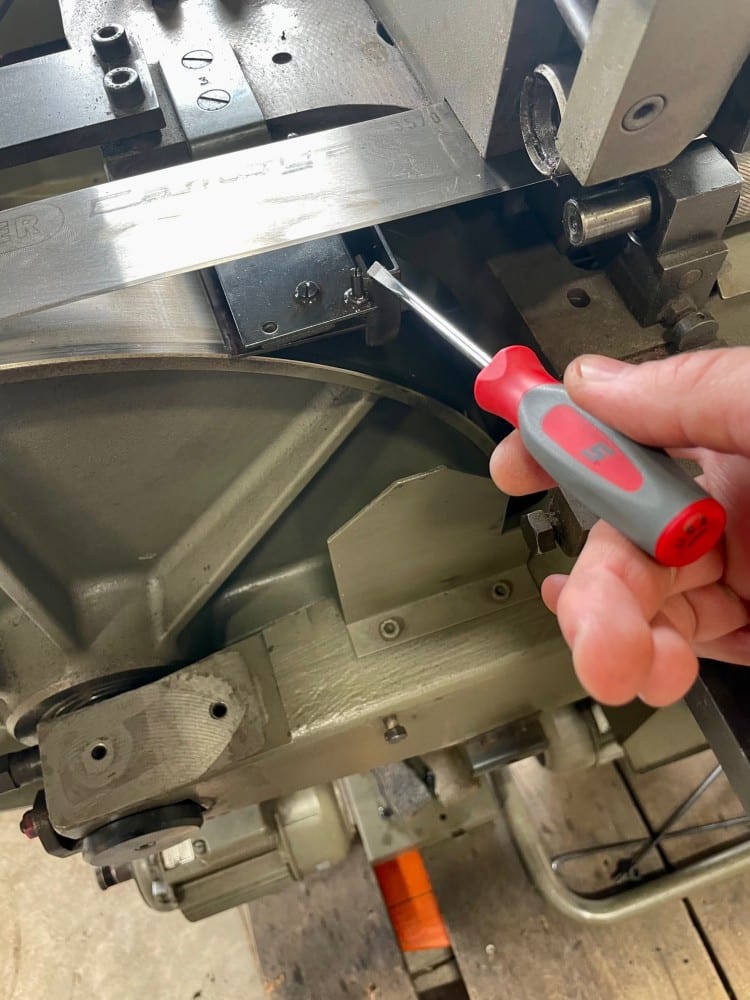
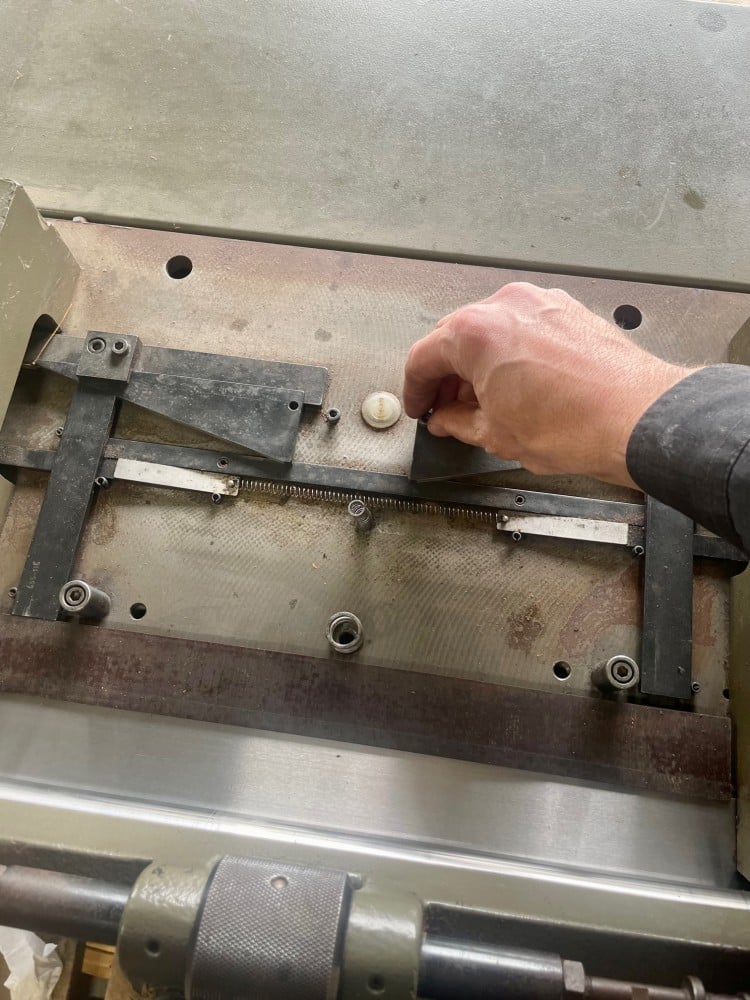
Remove the rear cover and remove the knife guide plate.
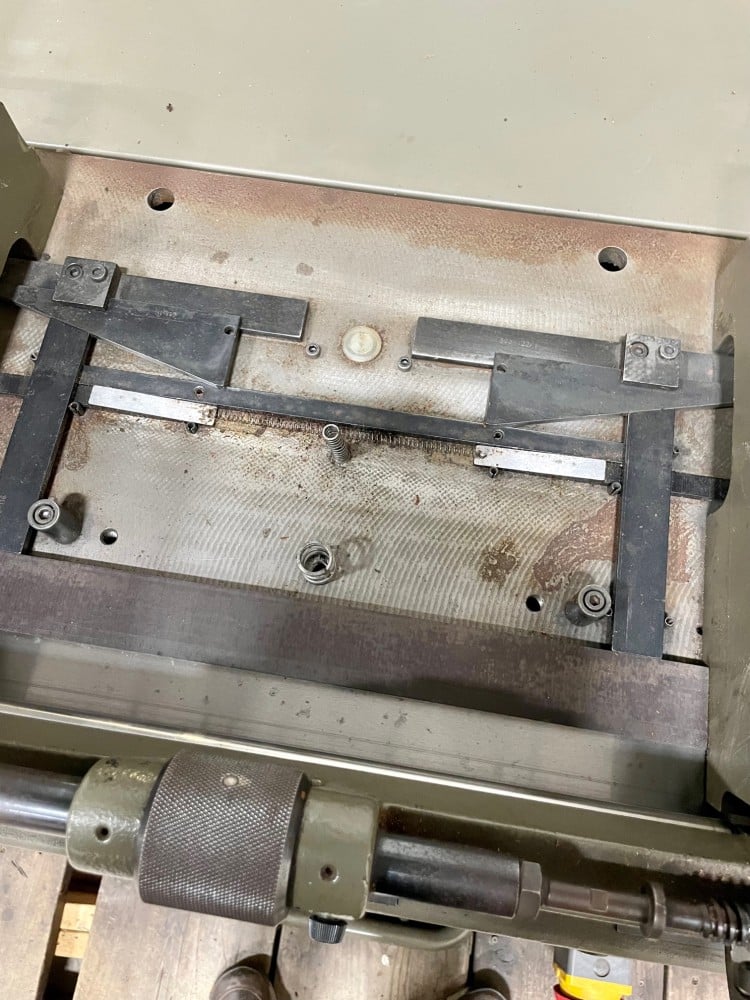
Remove springs from under the guide knife plate.
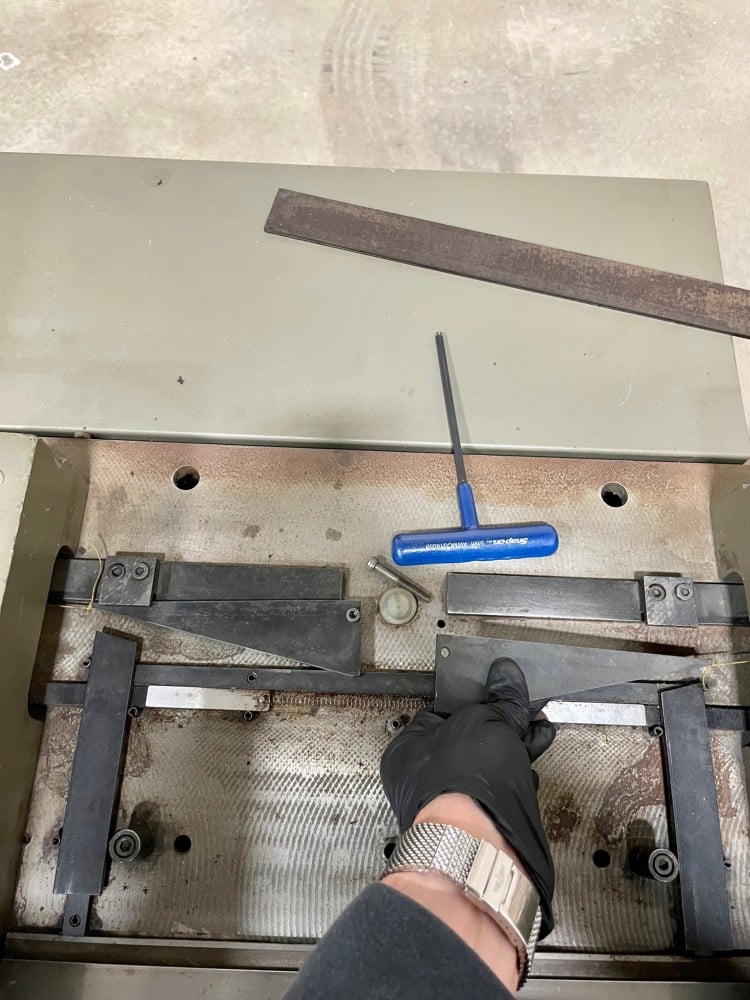
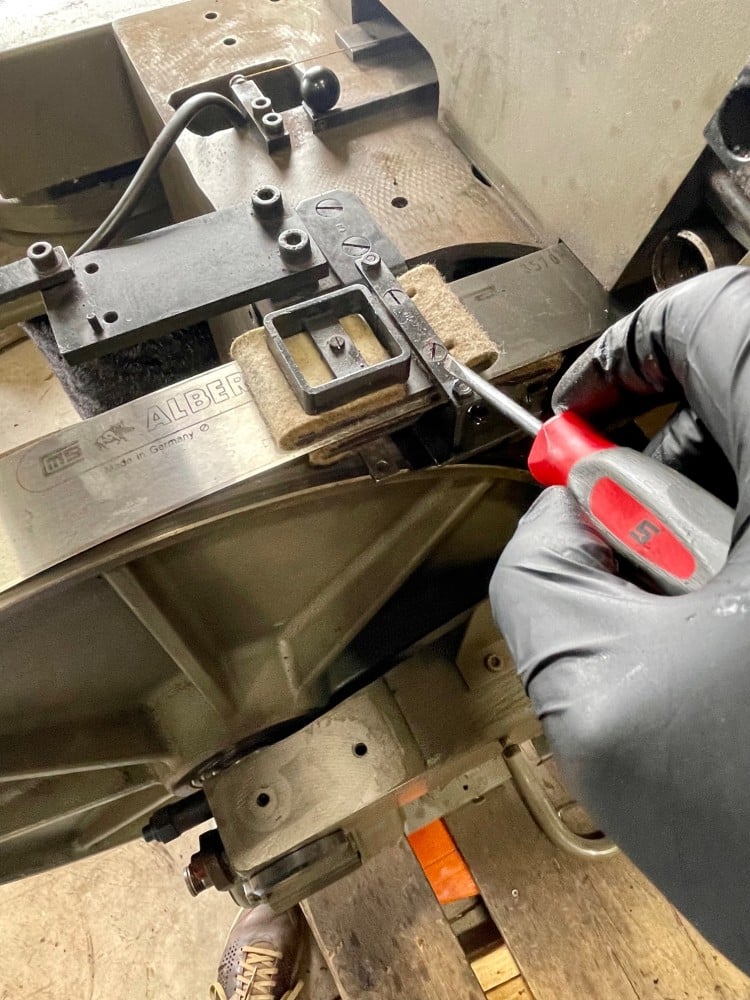
Pull both feed wedges inward the the two setting wedges outward and lock by means of bolts.
Unhook scrap box and take it out. Lift flap in the rear of the grinding device. Pop out the small plastic cover.
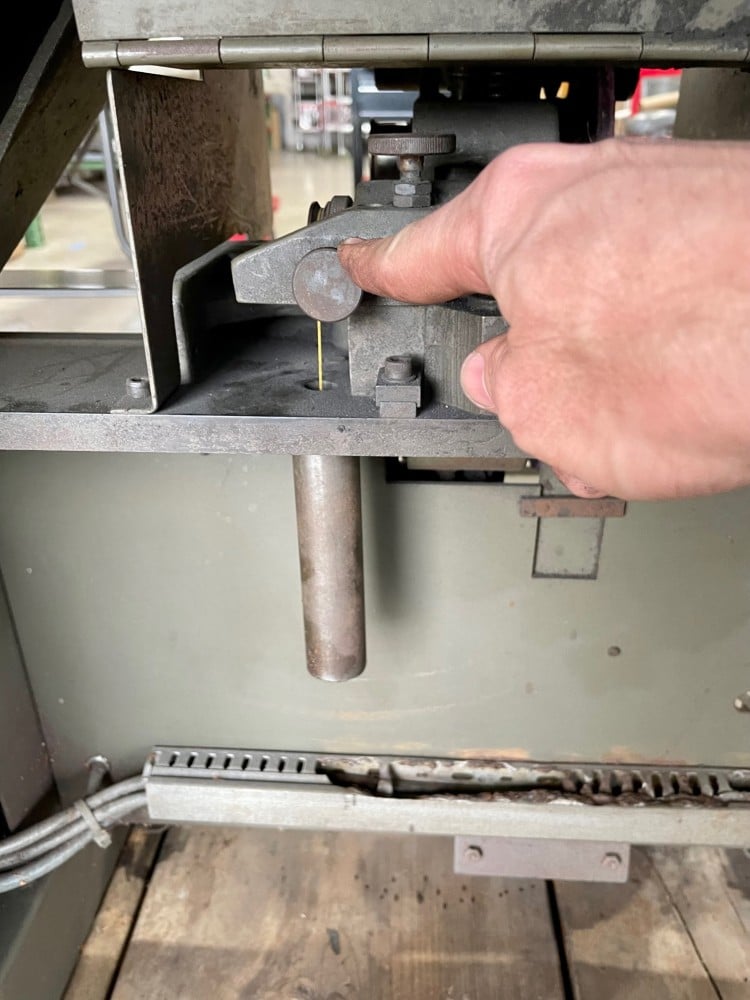
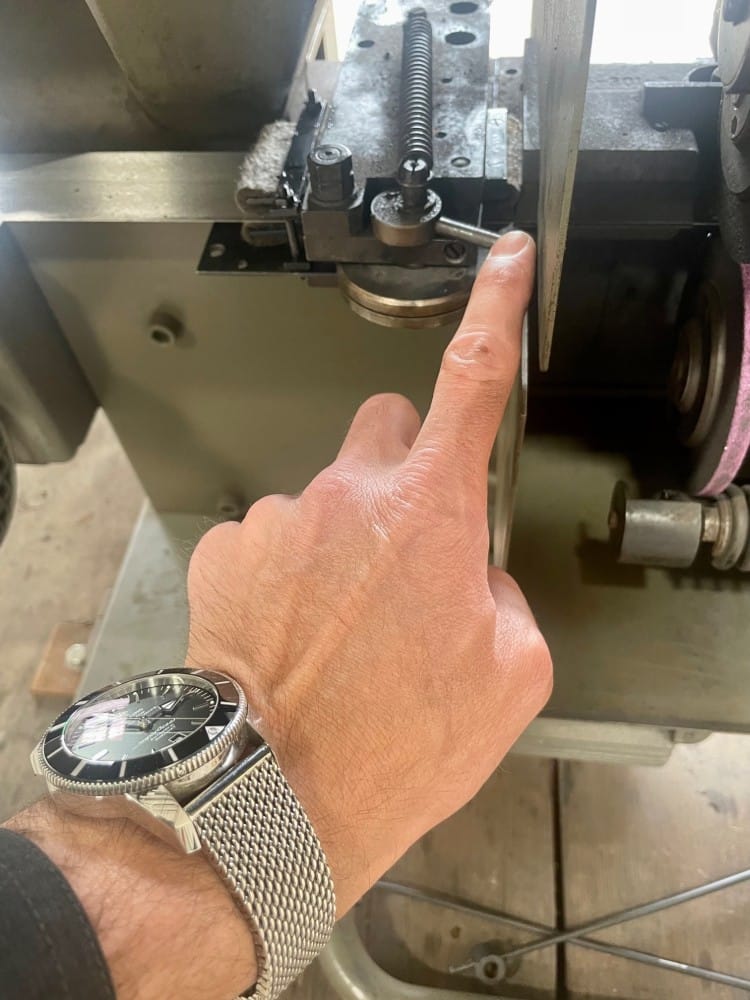
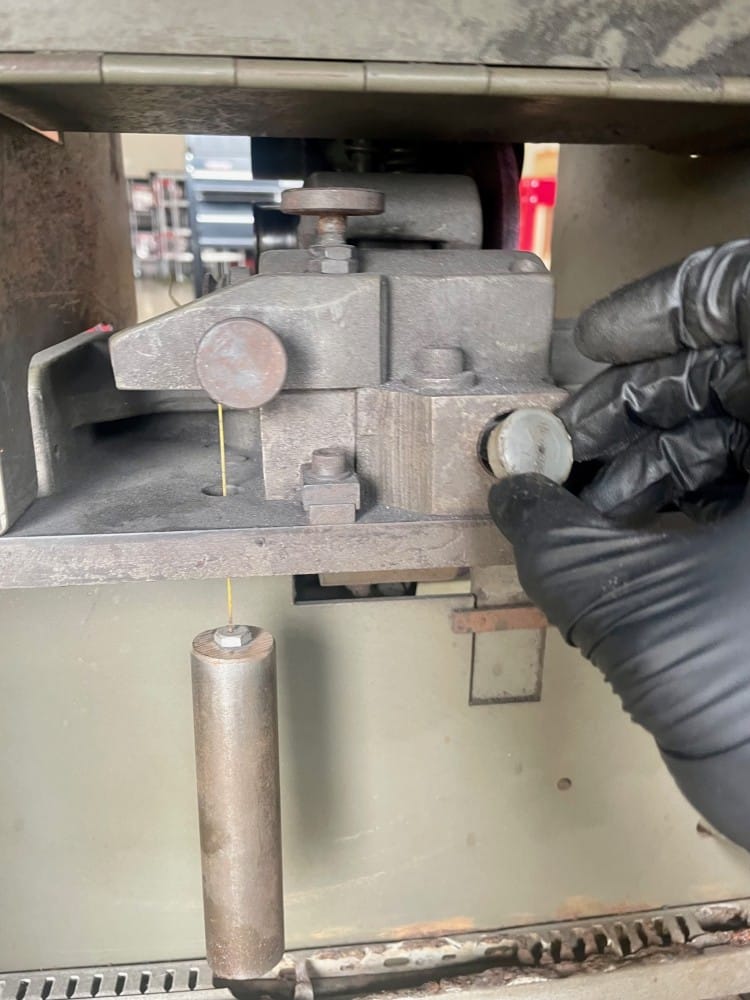
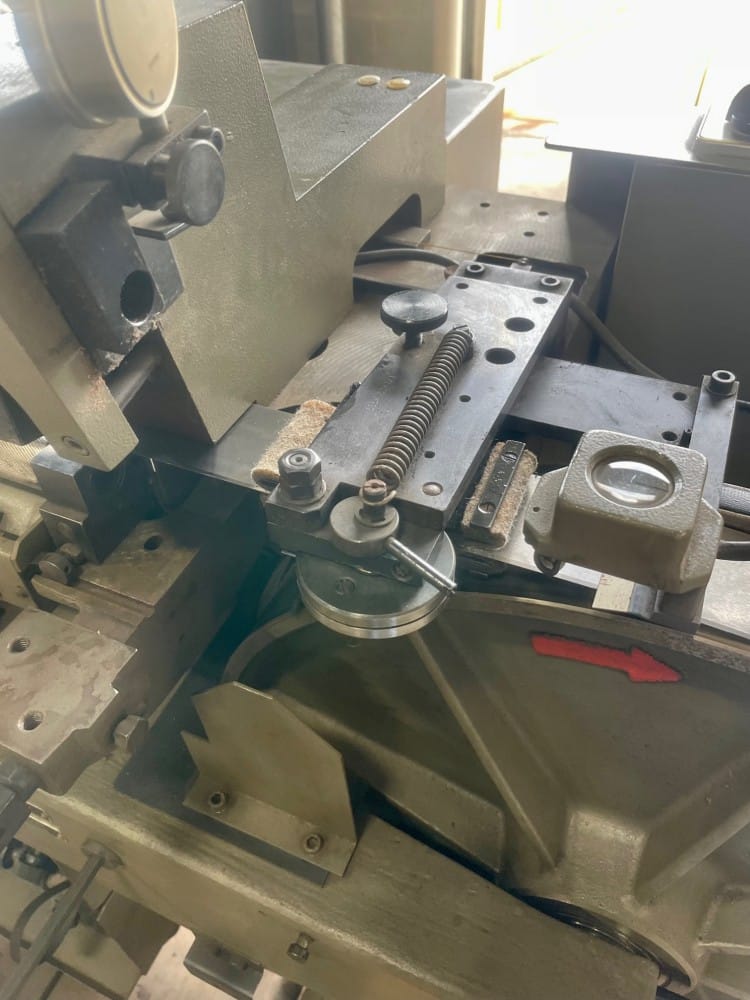
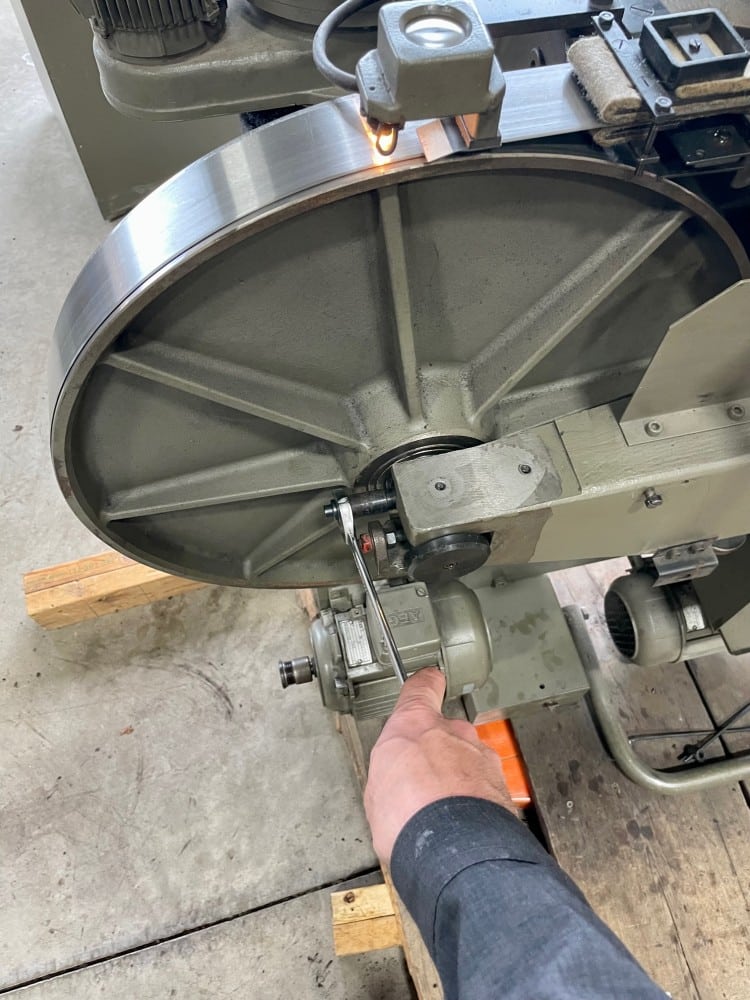
Turn the pulley which supports the weight shown, then tighten the knurled knob which I’m pointing at. This will take the weight off of the lower knife guide plate.
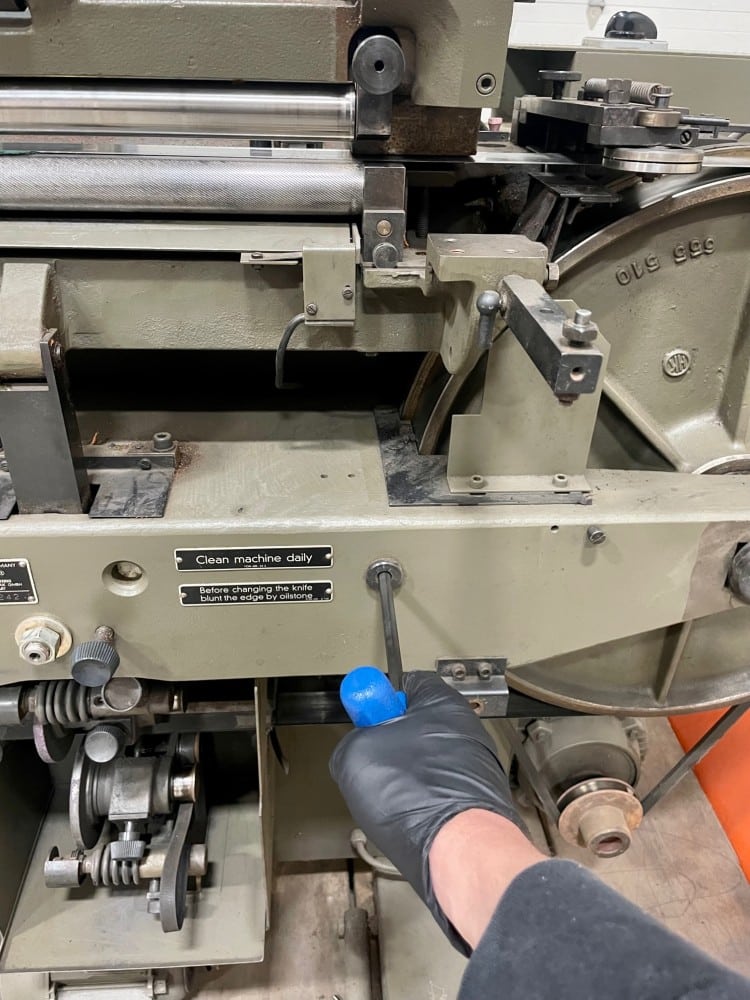
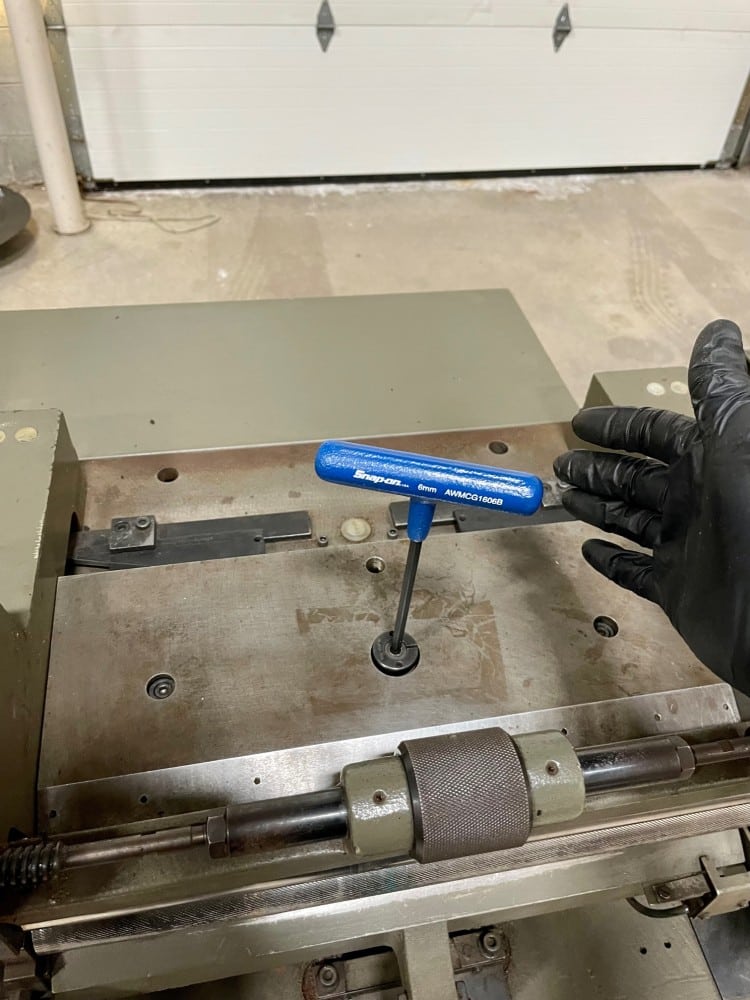
Release the knife tension device turning it towards the right by means of a T-handle hex wrench. You will most certainly need a T-handle for this, a common Allen wrench will simply not turn it due to how tight the adjustment must be.
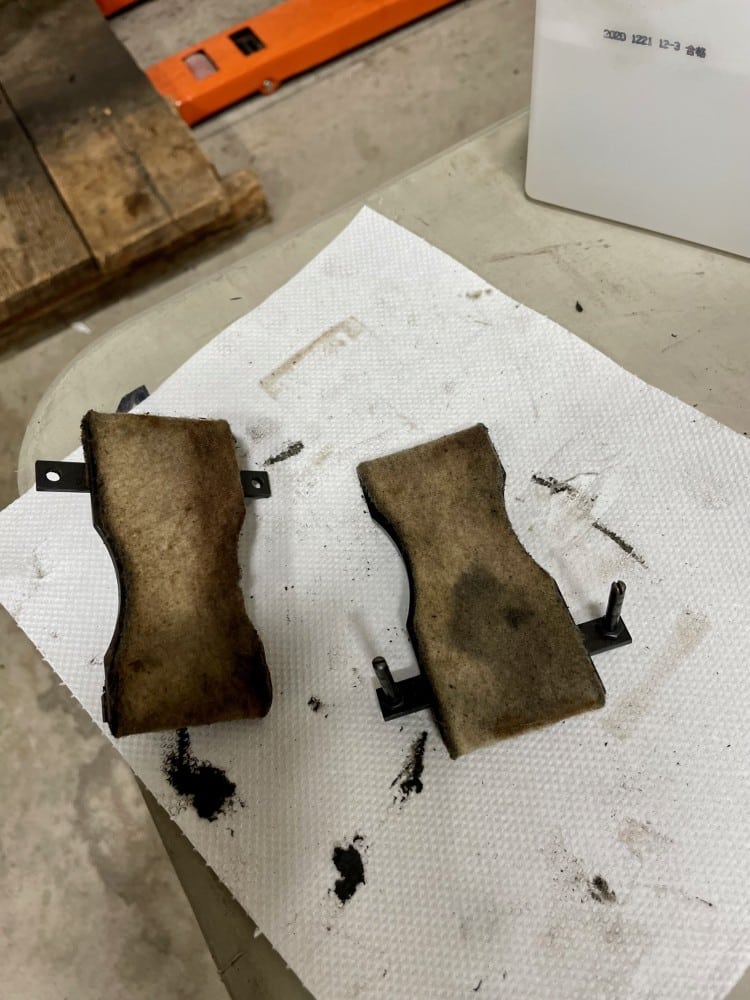
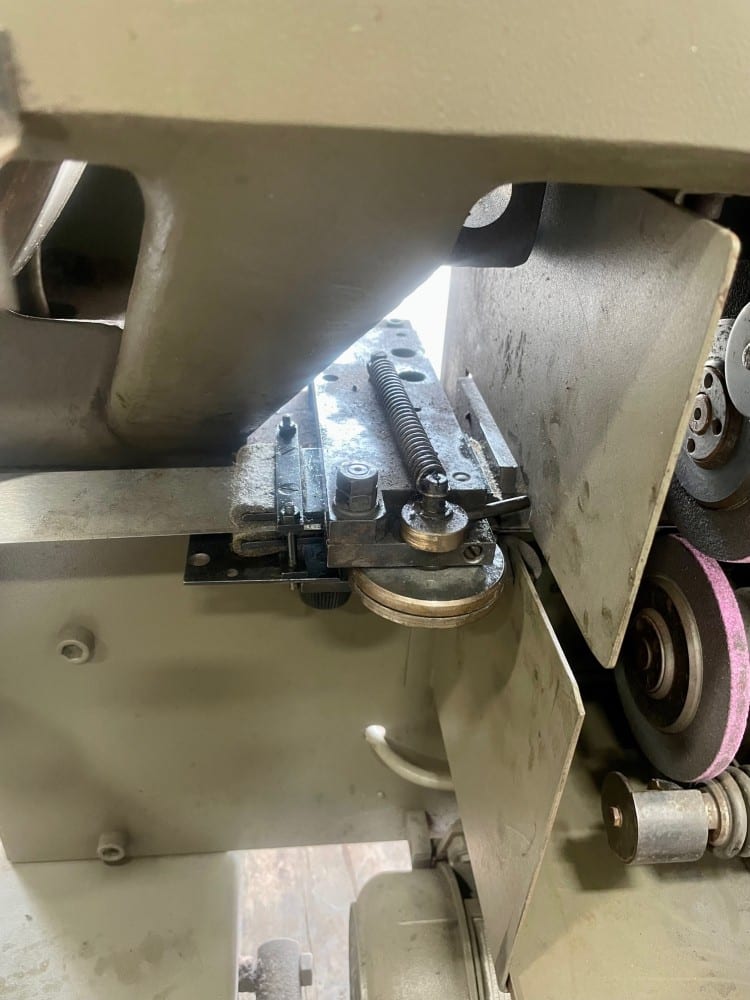
Remove the oil felts, disengage the scraper plates, and set them aside for cleaning or replacement. In our case we just flipped them over on the other side which was essentially brand new. There are 3 sets of oil felts which are not interchangeable, not not confuse their location on the machine.
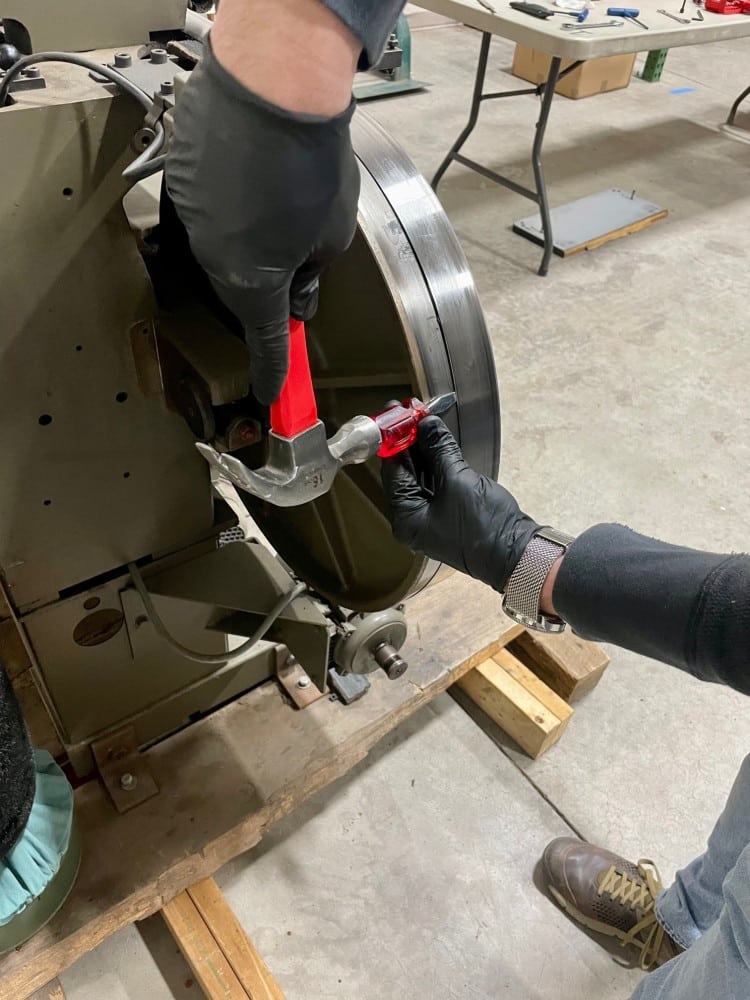
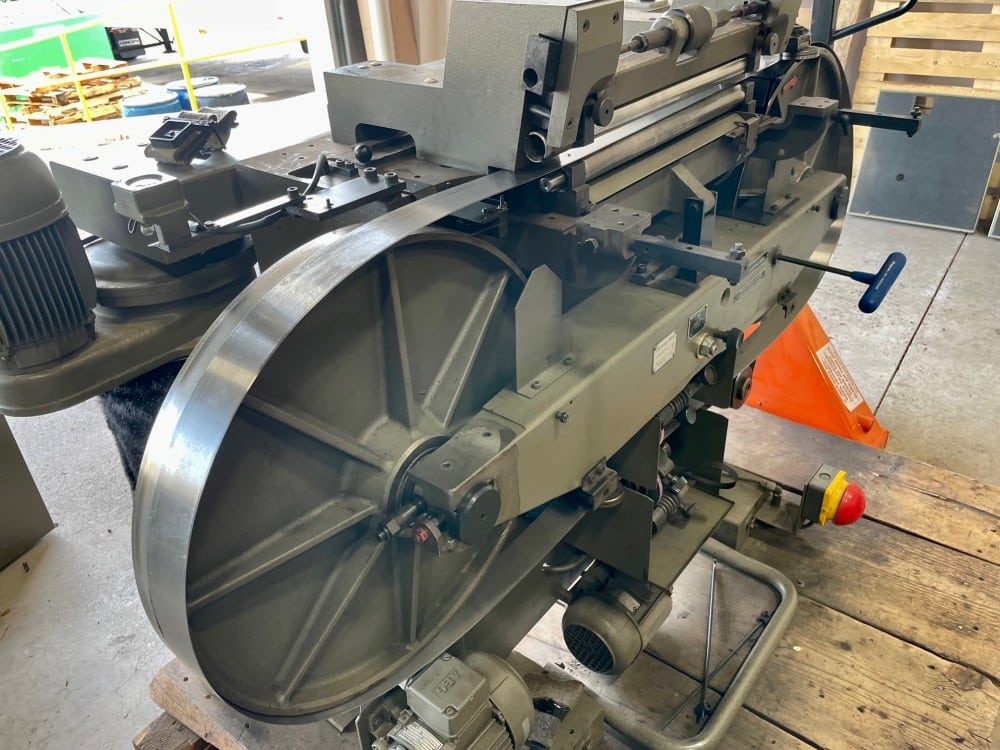
Now the band knife can be taken out. Even after loosening the knife tension device, I still had to use force to remove it. A few light taps from a standard head screw driver worked perfect. Always work on the fly wheels, do not force the blade in an unsupported area.
The band knife blade on this Fortuna SAS 15″ leather splitting machine has been completely removed. I would strongly suggest blowing every nook and crack out with compressed air. Get into every inch of the machine. Then I would suggest checking all belts for wear or damage. Next oil every moving part, wipe things down with an oiled rag and really inspect your machine.
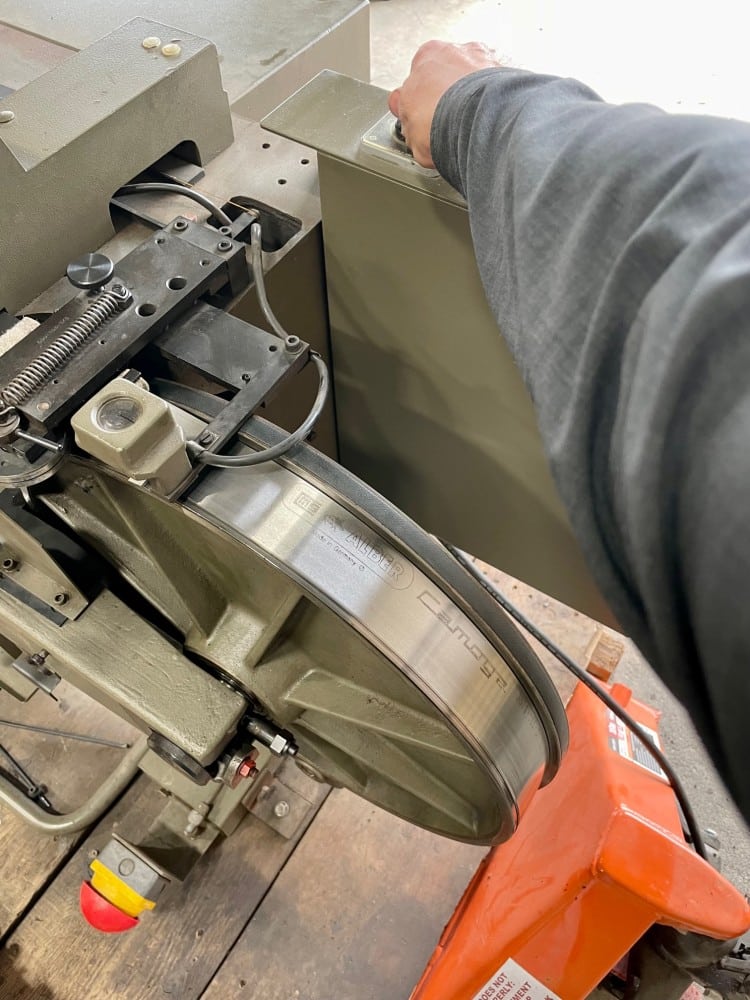
Wipe your new band knife down with an oiled rag and reinstall it into the machine.
Push the band knife onto the drive wheel slowly from the top on the bottom. Do not damage the blade edge by hitting it.
Push the band knife blade onto the fly wheel at the same time as on the drive wheel. Back and forth on both sides, turning the wheels to help guide it into place.
After the blade has been placed on the machine, fill the oil container.
Replace first oil felts, scraper plates, and be sure the new band knife is fully between the guide system.
Replace second upper oil felts, scraper plates, and be sure the new band knife is fully between the guide system.
Replace lower oil felts and be sure the new band knife is fully between the guide system.
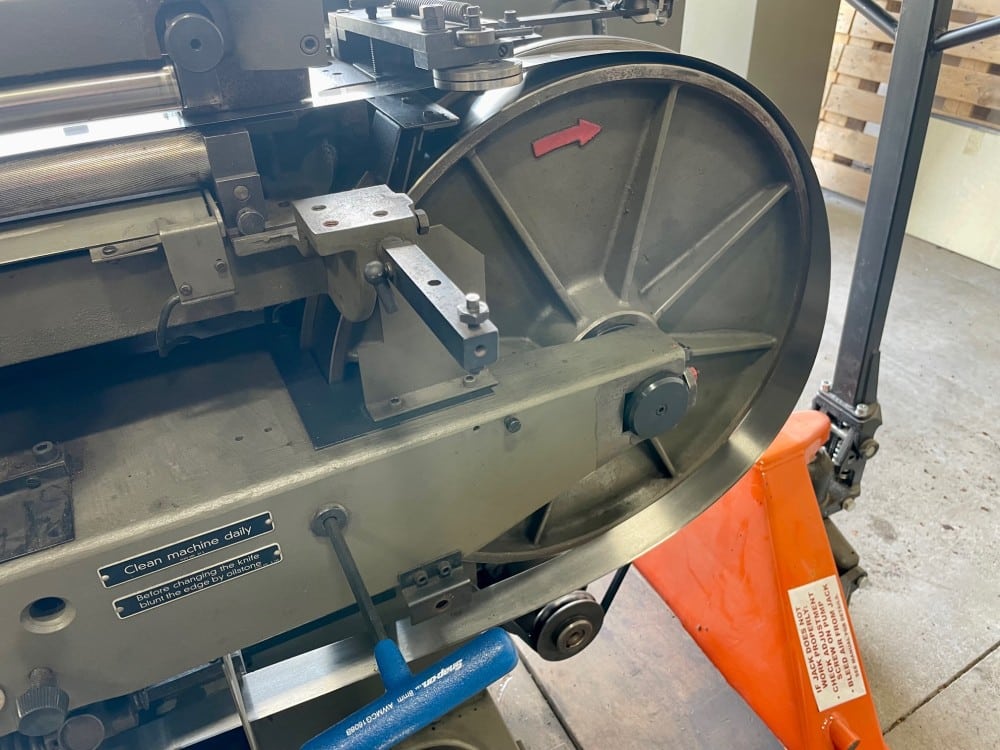
Place the band knife solder seam over the drive wheel. It is impossible to see, so just put the manufacture’s seal near the upper band knife guide where it meets the drive wheel.
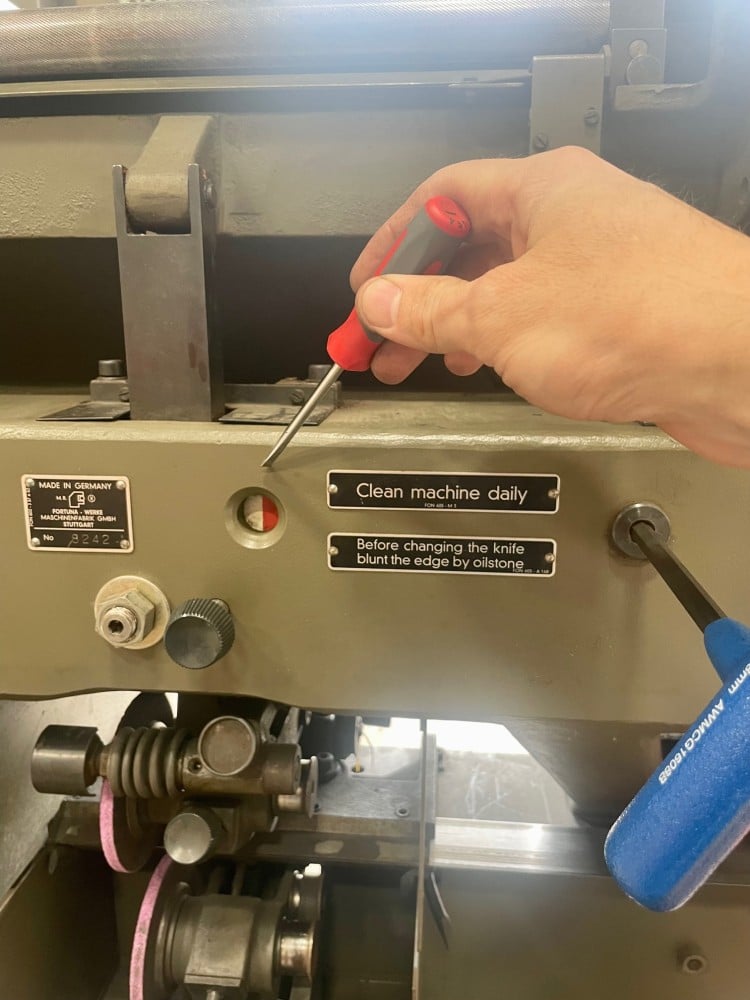
Tighten the band knife tensioner unit with a T-handle hex wrench. A regular Allen wrench does not have enough leverage to turn this bolt so get the correct tool for the job. As you turn the tensioner bolt, turn the right side wheel (drive wheel) by hand. this will help even out the placement of the blade as it spins. Tighten tensioner unit the indicator plate is half white and half red.
Turn eccentric disks into their initial position (blade into grove) and turn the knurled screw at the upper and lower supporting rolls until just barely engaged.
Swing the lens holders forward.

Spin the blade by hand and check its position using the lenses on both sides of the machine.
Turn the machine on and allow it to run freely.
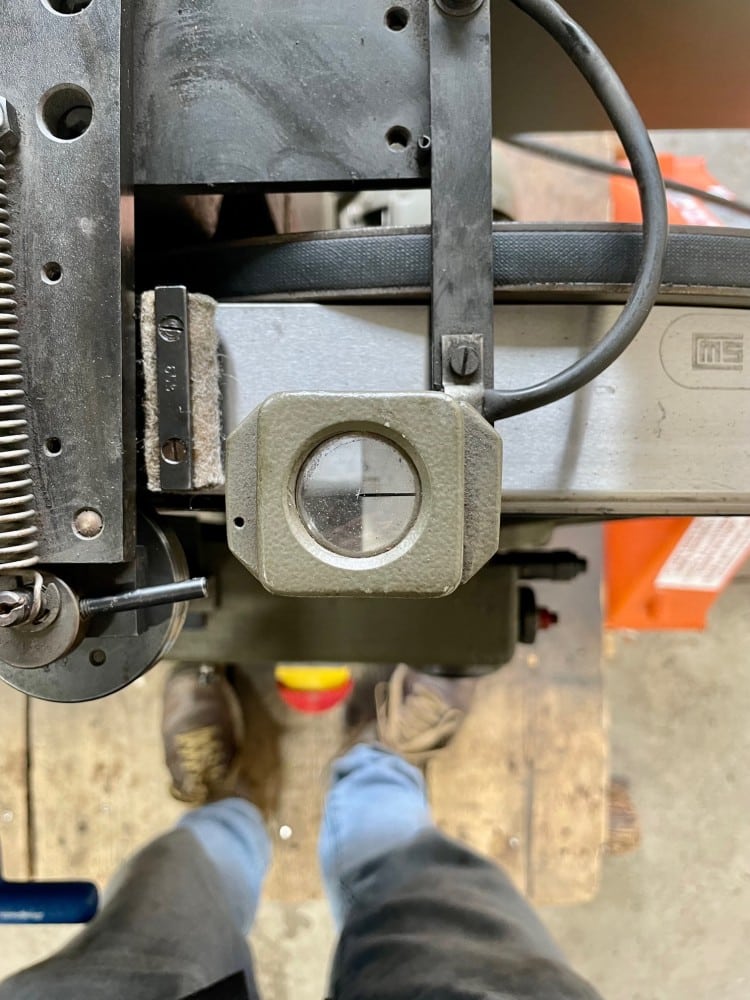
Check the blade placement using the lenses on both sides of the machine while its running. If this looks correct move onto the next step, if it does not you’ll need to adjust your left and right side wheels.
To adjust the forward and parallel motion of the band knife, the upper knife back guide or lower guide must not be pressing the band knife forward. Best to just not engage them at all until the blade runs straight and true. To adjust forward motion, loosen the hex head screw on both sides of the machine then turn the supporting screw every so slightly in the direction of :
Turn to the left: Forward motion is increased
Turn to the right: Forward motion is reduced
Turn only a small amount to get big results, if you turn it the wrong way or to much you’ll know instantly when the machine is turned on. It’ll make noise like it never has before. I would not recommend running the machine while you turn these supporting screws, they are so close to the fly and drive wheels that you’re just asking to get a wrench stuck in the wheel while its moving.
Attention: NEVER LOOSEN THE RED NUTS EVER OR ANY REASON!!!
Make your adjustments and run it again. Use the lenses to get a good position on the blade. When you’ve establish a perfect run pattern for your new band knife, tighten the hex screw on the cylindrical forward motion screws. One on each end of the Fortuna SAS leather splitting machine.
Release the feed wedges on the main body.
Reinstall the springs and knife guide plate to the machine.
g
Attach back cover
Loosen the knurled screw and allow the weight to drop. This will engage the back knife guide.
Be sure to replace the plastic cap!
Now turn on the machine and allow it to run freely. There should be no strange noises, rubbing, etc.
Use the lenses to ensure the blade is still running very true. If it still needs a slight adjustment…
If band blade adjustment forward or backward is needed, then turn the upper and lower knurled screw on the supporting rolls. Do not turn these extremely, you will put stress on the blade. This is a very small adjustment detail, if more adjustment forward or back is needed you’ll need to turn the cylindrical screws. Turn the machine off and use a gauge or a caliper to measure the distance from the very leader edge of the knife guide plate to the very front edge of the blade. It should be approximately 3.8mm to 4.0 mm, we prefer 3.8mm just to accommodate different types of leather
Reengage the serpentine belt on the self sharpener.
Reinstall the feed drive mechanism. You will need a standard 90 degree angle Allen wrench for this, a T-handle will not work.
Reinstall both upper and lower articulated shafts, be sure to replace the plastic sleeve inside the spring.
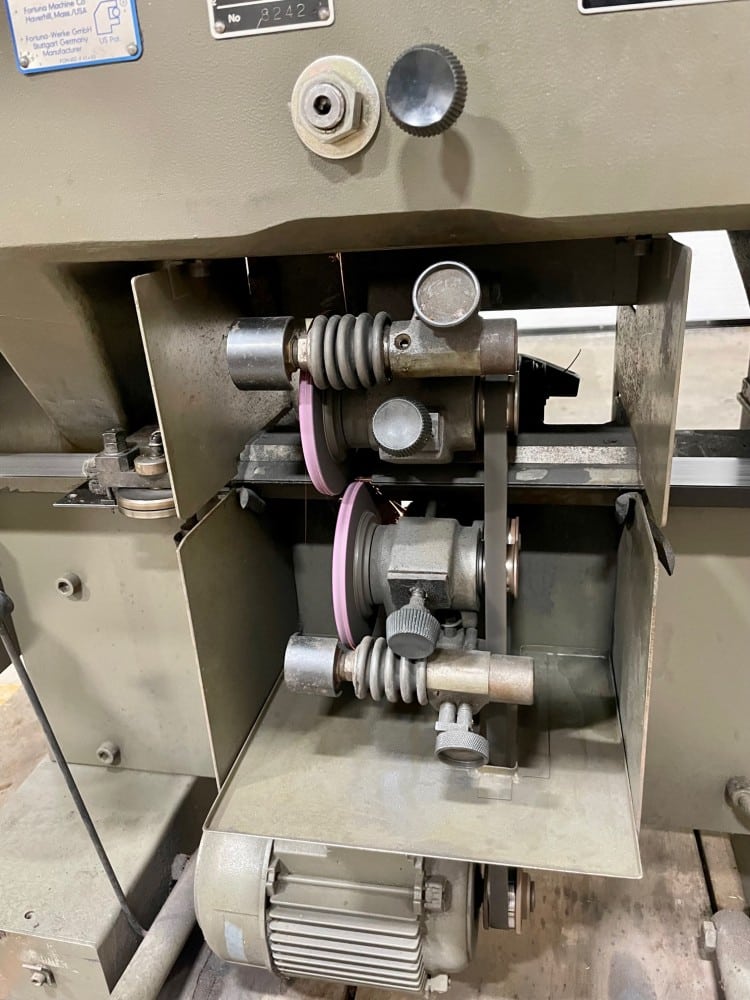
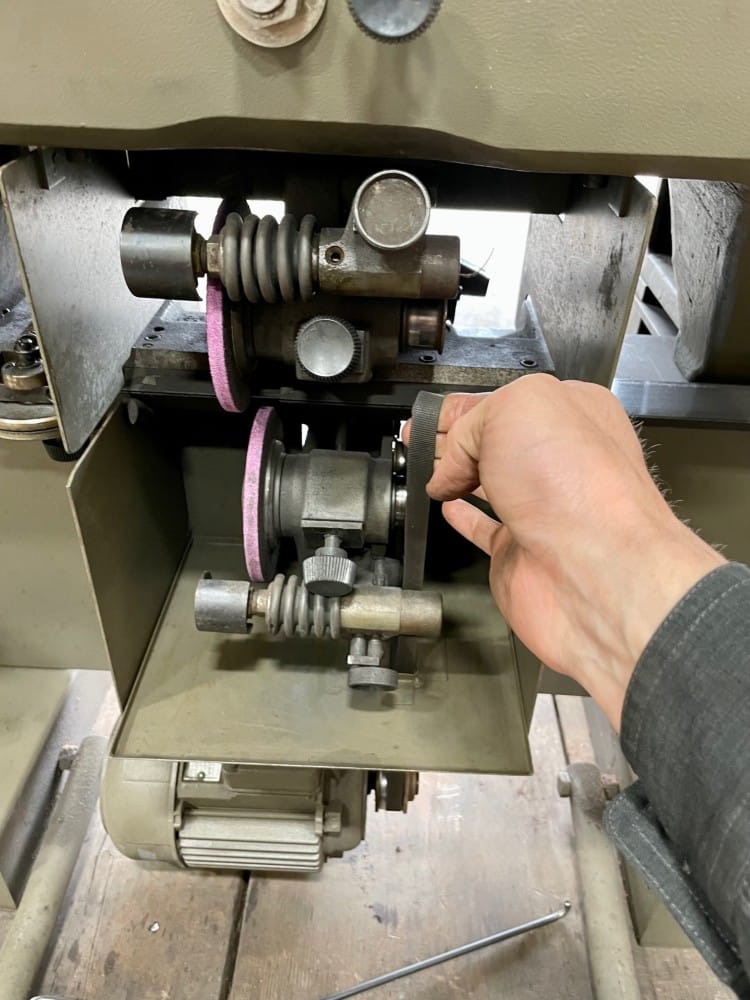
Everything is ready to begin sharpening the blade. Turn the machine on, check all of the forward and parallel motions, and if all is good slowly start to move the two sharpening stones together until they barely spark. Be sure to wear safety glasses while setting this up. Turn the stones together at the exact same time until a decent amount of sparks are flying. Remember, we are now sharpening a dull blade not touching up a sharp blade so you’ll need to be kind of aggressive with your sharpening.
Sharpening may take awhile! Our blade had a tiny “ding” in it so I left it sharpen for approximately 15 minutes uninterrupted. After 15 minutes, I started to run some scrap through the machine. It still just was slightly dull so I left it run a few more minutes. More scrap, we’re getting closer, so a few more minutes. One more scrap run, the leather split like butter! I backed the sharpening stones off and reset them to a “touch up” barely sparking or sparking consistently very little.
Replace both left and right side covers as well as the front cover.
The band knife replacement on our Fortuna SAS leather splitting machine is finally complete. Be sharp and focused when you do this job, these machines are very complex and almost no one can help you if you’ve messed something up or broke something on these machines. Owning a Fortune 15″ splitter is a game changer if you’re in the leather goods manufacturing business. Take care of your things and they will take care of you!
